
Installing Jupyter in Macbook Air M1 (Updated 2024)

In this post I’m going to list the steps to install jupyter notebooks in a Macbook Air M1.
What is Jupyter notebook?
It’s an open-source web application that allows us to share and create documents that have live code, visualizations, and narrative text.
It supports over 40 programming languages (not only Python) and you can share those documents with others using Github, Dropbox, or email.
Why Jupyter if I’m a Java developer?
At the time of writing this blog post, I don’t have experience developing with Python and I decided to give it a try playing around with the language and with Jupyter notebooks.
Java is criticized for its verbosity as a programming language and Python is recommended for beginners because the learning curve is lower and in few lines of code you can achieve more.
Even that a vast majority of my experience has been working with Java, I’m curious about other programming languages and technologies that can help solve problems differently.
Installing Homebrew
Having homebrew installed on your laptop is useful because it’s a package management system that allows you to install anything that you need in your mac system.
You just have to copy-paste the following command in your terminal and execute. More information available here.
/bin/bash -c "$(curl -fsSL https://raw.githubusercontent.com/Homebrew/install/HEAD/install.sh)"
After installing it we can update brew with the following command.
brew update && brew doctor
Installing Python
We then install pyenv that lets us switching Python version easily.
brew install pyenv
with the following command, we install Python version 3.9.1
pyenv install 3.9.1
with the following command, we can add the initialization of pyenv new values into the .zshrc file, this way we don’t have to type the same command everytime we open a new terminal, in my case I use iterm2.
echo 'eval "$(pyenv init -)"' >> .zshrc
then we set the Python version 3.9.1 globally.
pyenv global 3.9.1
Installing Jupyter
With the next command, we can install jupyter using pip3 that is a package management system useful to install and manage software packages written in Python.
pip3 install jupyter
I got the following error when running the previous command:
ERROR: Command errored out with exit status 1:
   command: /Users/alex/.pyenv/versions/3.9.1/bin/python3.9 /Users/alex/.pyenv/versions/3.9.1/lib/python3.9/site-packages/pip install --ignore-installed --no-user --prefix /private/var/folders/88/9dwq00q54nb8763hg0fd3c1h0000gp/T/pip-build-env-v2dsd0y6/overlay --no-warn-script-location --no-binary :none: --only-binary :none: -i https://pypi.org/simple -- 'maturin>=1.0,<2.0'
       cwd: None
  Complete output (58 lines):
  Collecting maturin<2.0,>=1.0
    Downloading maturin-1.5.1.tar.gz (181 kB)
    Installing build dependencies: started
    Installing build dependencies: finished with status 'done'
    Getting requirements to build wheel: started
    Getting requirements to build wheel: finished with status 'done'
      Preparing wheel metadata: started
      Preparing wheel metadata: finished with status 'done'
  Collecting tomli>=1.1.0; python_version < "3.11"
    Using cached tomli-2.0.1-py3-none-any.whl (12 kB)
  Building wheels for collected packages: maturin
    Building wheel for maturin (PEP 517): started
    Building wheel for maturin (PEP 517): finished with status 'error'
    ERROR: Command errored out with exit status 1:
     command: /Users/alex/.pyenv/versions/3.9.1/bin/python3.9 /Users/alex/.pyenv/versions/3.9.1/lib/python3.9/site-packages/pip/_vendor/pep517/_in_process.py build_wheel /var/folders/88/9dwq00q54nb8763hg0fd3c1h0000gp/T/tmpllbyywb7
         cwd: /private/var/folders/88/9dwq00q54nb8763hg0fd3c1h0000gp/T/pip-install-x887a37u/maturin
    Complete output (35 lines):
    /private/var/folders/88/9dwq00q54nb8763hg0fd3c1h0000gp/T/pip-build-env-57dr_b4d/overlay/lib/python3.9/site-packages/setuptools/config/_apply_pyprojecttoml.py:83: SetuptoolsWarning: `install_requires` overwritten in `pyproject.toml` (dependencies)
      corresp(dist, value, root_dir)
    running bdist_wheel
    running build
    running build_py
    creating build
    creating build/lib.macosx-14.2-arm64-cpython-39
    creating build/lib.macosx-14.2-arm64-cpython-39/maturin
    copying maturin/__init__.py -> build/lib.macosx-14.2-arm64-cpython-39/maturin
    copying maturin/import_hook.py -> build/lib.macosx-14.2-arm64-cpython-39/maturin
    copying maturin/__main__.py -> build/lib.macosx-14.2-arm64-cpython-39/maturin
    running egg_info
    creating maturin.egg-info
    writing maturin.egg-info/PKG-INFO
    writing dependency_links to maturin.egg-info/dependency_links.txt
    writing requirements to maturin.egg-info/requires.txt
    writing top-level names to maturin.egg-info/top_level.txt
    writing manifest file 'maturin.egg-info/SOURCES.txt'
    reading manifest file 'maturin.egg-info/SOURCES.txt'
    reading manifest template 'MANIFEST.in'
    warning: no files found matching '*.json' under directory 'src/python_interpreter'
    writing manifest file 'maturin.egg-info/SOURCES.txt'
    running build_ext
    running build_rust
    error: can't find Rust compiler

    If you are using an outdated pip version, it is possible a prebuilt wheel is available for this package but pip is not able to install from it. Installing from the wheel would avoid the need for a Rust compiler.

    To update pip, run:

        pip install --upgrade pip

    and then retry package installation.
Then I run the following command:
> pip install --upgrade pip
Running Jupyter
Once jupyter is installed we can run a jupyter notebook with the following command.
jupyter notebook
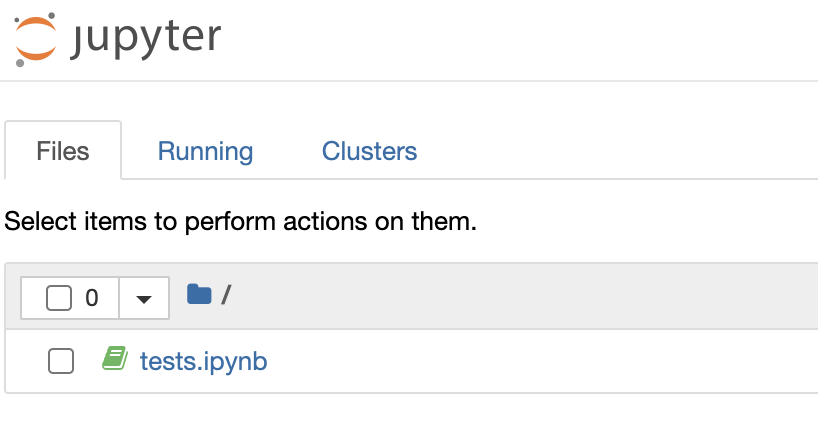
And ‘voila’ we have jupyter notebook running in our Macbook Air M1 on http://localhost:8888/tree
Fixing the Jupyter kernel issue
There’s a problem with Jupyter notebook kernel that stops working in our shiny Macbook m1 laptop. A workaround is explained in this George Hotz youtube video.
We have to look for eventloops.py file in our system. To do this we can execute the following command:
find / -name eventloops.py
Then in my case, I found the file in the following path that I opened using vi
vi /System/Volumes/Data/opt/homebrew/lib/python3.9/site-packages/ipykernel/eventloops.py
We have to navigate to the function def _use_appnope() and the line of code to change is the return line. After V(‘10.9’), we have to add:
and platform.mac_ver()[2] != 'arm64'
we save and close the file and the kernel should not stop anymore :-)
update:
As a workaround to the following problem:
Installing Python-3.9.1...
python-build: use readline from homebrew
python-build: use zlib from xcode sdk

BUILD FAILED (OS X 11.3.1 using python-build 20180424)
you can try:
arch -x86_64 pyenv install 3.9.1
then after installing it execute the following command in the terminal
pyenv local 3.9.1
next step open file .zshrc and add the following line at the end of file
eval "$(pyenv init -)"
close the terminal and open a new one, then execute:
python -V
and you should see
Python 3.9.1
Conclusion
In this post, we have seen how to install Jupyter notebook in a Macbook Air M1. Now it’s time to see what things we can do with Jupyter notebooks but this will be in another post.
Comments